

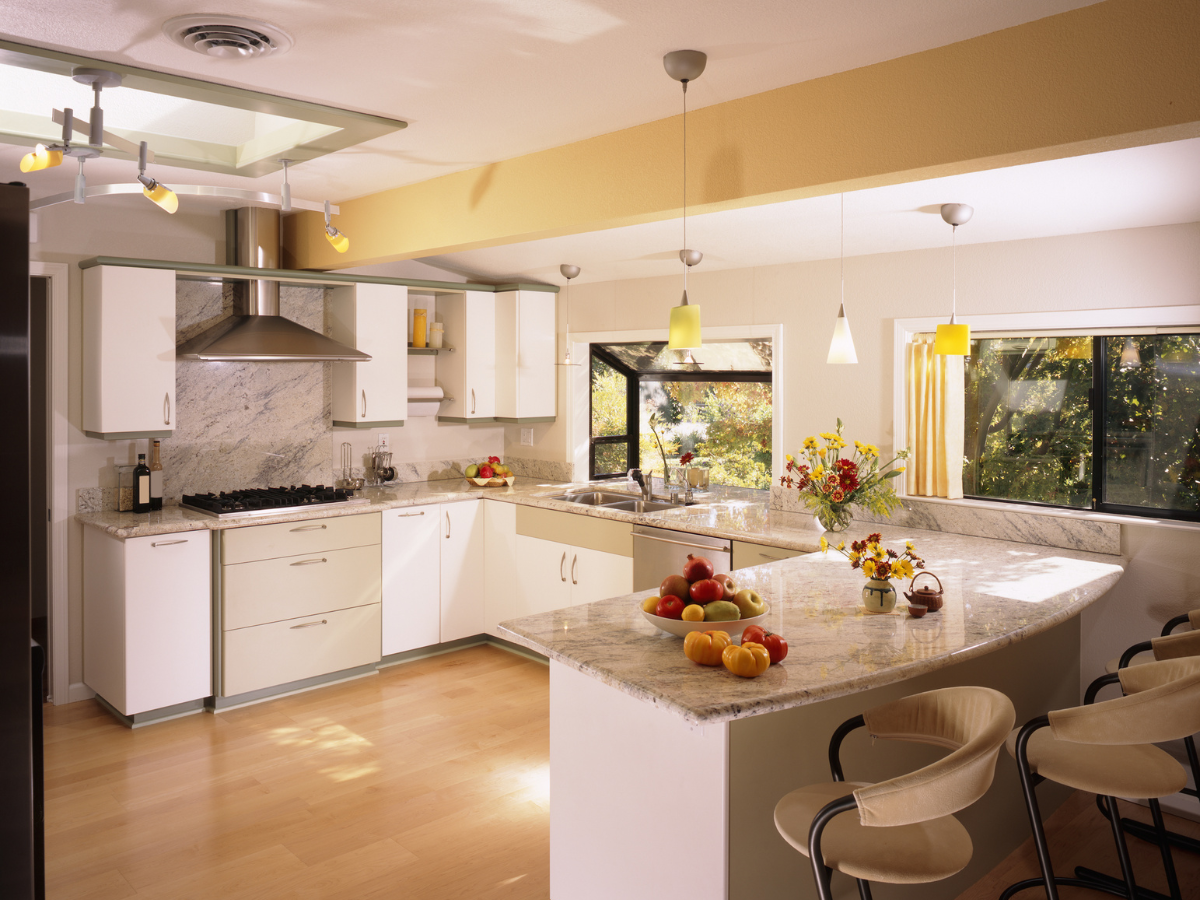
A kitchen makeover can deliver a dramatic transformation without requiring every part of the project to be handed over to a contractor.
From refreshing cabinets and hardware to installing a backsplash or improving storage, homeowners with the right skills can tackle many updates themselves while keeping renovation costs under control.
Successful DIY kitchen remodeling depends on knowing what to handle, what to plan for, and where professional expertise becomes essential.
Accurate measurements, realistic budgeting, proper sequencing, and careful material choices can prevent common mistakes that turn a weekend project into an expensive headache. Electrical, plumbing, structural, and permit-related work may also require qualified professionals.
These DIY kitchen remodeling tips will help you prioritize projects, plan efficiently, and create a kitchen makeover that looks polished while staying practical, safe, and within budget.
DIY Kitchen Remodeling: What to DIY and What to Leave to the Pros
How to Plan a Successful DIY Kitchen Remodel
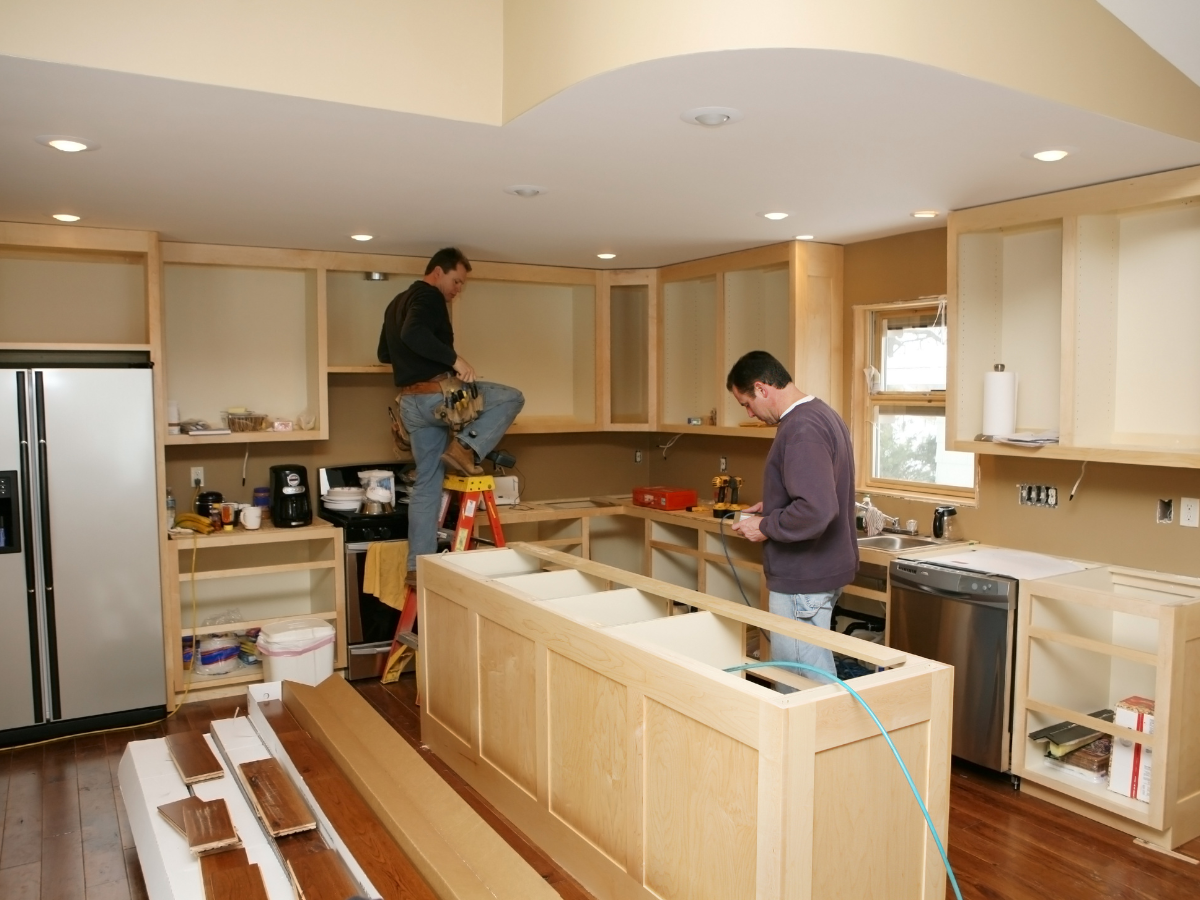
A successful DIY kitchen remodel starts well before demolition. The planning stage is where you determine what needs to change, what you can realistically handle yourself, how much the project will cost, and in what order the work should happen.
Kitchen renovations are particularly dependent on sequencing. Cabinets, countertops, plumbing, electrical work, flooring, appliances, and finishes often affect one another.
Changing a sink location, for example, is not simply a cabinetry decision. It can also affect plumbing, countertop fabrication, electrical placement, and the overall project schedule.
For DIY kitchen remodeling, a written plan helps prevent expensive changes after materials have been ordered or work has already begun.
Assess the Existing Kitchen Before Making Design Decisions
Start by documenting what you already have. Measure the room carefully, including walls, ceiling height, windows, doorways, appliance openings, plumbing locations, electrical outlets, vents, and any architectural features that affect the layout.
Then evaluate how the kitchen actually functions. Instead of focusing only on outdated finishes, identify everyday frustrations. Are frequently used items difficult to reach? Is there too little prep space near the sink or cooktop? Do appliance doors interfere with walkways? Is storage poorly organized?
Also look for conditions that may change the scope of the remodel, such as water damage, uneven flooring, outdated wiring, inadequate ventilation, or plumbing problems. Some issues may not become fully visible until demolition begins, which is why a contingency should be part of both the budget and schedule.
Define What the Remodel Needs to Accomplish
A clear list of priorities makes later decisions easier. Separate genuine needs from optional upgrades and aesthetic preferences.
Your priorities might include improving storage, adding usable countertop space, replacing damaged cabinetry, upgrading appliances, improving lighting, or creating a layout that works better for multiple cooks.
If resale is part of the goal, consider whether highly personalized features make sense for the property and neighborhood.
This is also the point to decide whether you are planning a cosmetic update or changing the kitchen’s footprint. Painting cabinets and replacing hardware involve a very different level of cost, skill, and disruption than relocating plumbing, removing walls, or installing entirely new cabinetry.
Build a Budget Around the Full Project Scope
Do not budget only for the obvious purchases. Cabinets, countertops, appliances, flooring, fixtures, lighting, hardware, paint, fasteners, disposal fees, permits, tool rentals, delivery charges, and professional labor can all affect the final cost.
For DIY kitchen remodeling, it is especially important to distinguish between work you can perform confidently and work that should be handled by qualified professionals.
Electrical, plumbing, gas, structural modifications, and other regulated work may require permits, inspections, or licensed contractors depending on local requirements. Before purchasing materials, verify applicable building codes and permit requirements with your local authority.
Create the Kitchen Plan Before Ordering Materials
Once the scope and budget are established, translate the ideas into a detailed layout. Confirm cabinet dimensions, appliance clearances, countertop measurements, door swings, aisle space, plumbing locations, outlets, lighting, and ventilation.
Avoid ordering major components from rough measurements. A small dimensional error can affect an entire cabinet run or leave an appliance unable to fit its intended opening.
Product specifications matter too. Check installation requirements for appliances, sinks, faucets, range hoods, lighting, and other fixtures before finalizing the surrounding design. Knowing these details early can prevent conflicts during installation.
Sequence the Remodel in the Right Order
A kitchen remodel should follow a logical sequence rather than being treated as a collection of independent weekend projects.
While the exact order depends on the scope, planning generally needs to account for demolition, structural changes, plumbing and electrical rough-ins, wall repairs, flooring, cabinetry, countertop templating and installation, fixtures, appliances, and final finishes.
Some steps also depend on lead times. Custom cabinets or countertops may take longer than expected, while countertop fabrication often cannot begin until base cabinets are installed and verified.
Create the schedule around these dependencies instead of assuming every task can happen immediately after the previous one.
Decide Where DIY Work Ends and Professional Help Begins
One of the most useful planning decisions is determining what not to do yourself. Painting, hardware installation, demolition, backsplash work, or certain finish projects may be reasonable DIY tasks for an experienced homeowner.
Structural alterations or complicated electrical, plumbing, and gas work require a different level of expertise and may be regulated locally.
A strong DIY kitchen remodeling plan is not necessarily one where the homeowner completes every task. It is one where each part of the project is assigned appropriately, scheduled in the correct order, and completed without compromising safety or the finished kitchen.
How to Set a Realistic Budget for DIY Kitchen Remodeling

Budgeting for a kitchen remodel requires more than choosing a maximum amount you are comfortable spending. A useful budget connects every dollar to the actual scope of the project, including materials, tools, professional services, permits, deliveries, disposal, and unexpected repairs.
With DIY kitchen remodeling, it is easy to focus on the labor you expect to save by doing work yourself. Those savings can be meaningful, but they do not eliminate many of the other costs associated with renovation.
Building a detailed budget before purchasing materials helps you decide where DIY work makes financial sense and where professional help may be worth the expense.
Define the Scope Before Estimating Costs
Start by separating the remodel into individual projects. Instead of budgeting for “a new kitchen,” list exactly what will change: cabinets, countertops, flooring, backsplash, sink, faucet, lighting, appliances, paint, electrical work, plumbing, and any structural modifications.
Then classify each item as a repair, replacement, upgrade, or optional improvement. This prevents aesthetic upgrades from quietly consuming money needed for essential work.
Scope also has a major effect on cost. Repainting existing cabinets and replacing hardware is fundamentally different from installing new cabinetry. Keeping the sink and appliances in their existing locations can also simplify a project compared with a redesign that requires plumbing, electrical, gas, or ventilation changes.
Once the scope is clear, pricing becomes much more realistic.
Build an Itemized Kitchen Remodeling Budget
Create a budget that accounts for the entire project rather than only the visible finishes. Depending on the renovation, expenses may include:
- Cabinets and cabinet hardware
- Countertops and backsplash materials
- Flooring and underlayment
- Sink, faucet, and plumbing components
- Appliances and installation accessories
- Lighting and electrical materials
- Paint, trim, adhesives, grout, and fasteners
- Tools, safety equipment, and equipment rentals
- Delivery and disposal costs
- Permits and inspections where required
- Professional labor for work you will not complete yourself
Record estimated quantities and prices rather than entering a single allowance for each room feature. For example, a backsplash estimate should account for tile, mortar or adhesive, grout, trim pieces, spacers, sealant when applicable, and installation tools.
Small purchases are easy to overlook individually but can become a noticeable part of the final project cost.
Decide What Is Actually Worth Doing Yourself
DIY does not automatically mean cheaper. A project that requires specialized tools, extensive preparation, or corrections after a mistake may cost more than expected.
Before assigning a task to yourself, consider the equipment required, your existing experience, the time involved, and the consequences if something goes wrong. Painting or installing cabinet hardware may offer accessible opportunities to reduce labor expenses.
Electrical, plumbing, gas, structural work, and other regulated projects may require qualified professionals, permits, or inspections depending on local rules.
For DIY kitchen remodeling, the strongest budget often combines homeowner labor with strategically chosen professional services rather than attempting to eliminate outside labor completely.
Prioritize Spending Based on Function and Longevity
When the first estimate exceeds the available budget, avoid cutting every category equally. Decide which features have the greatest effect on how the kitchen functions and which upgrades can be postponed.
Cabinet storage, durable work surfaces, adequate lighting, reliable plumbing fixtures, and properly installed flooring may deserve priority over decorative features that are easier to change later.
Conversely, replacing an item simply because it looks dated may not make sense if it still functions well and can be refreshed affordably. A must-have, should-have, and nice-to-have list makes these tradeoffs easier when prices or project conditions change.
Include Room for Unexpected Costs
Renovation budgets should not assume that everything behind the existing cabinets, walls, and flooring is in perfect condition. Demolition may expose water damage, deteriorated materials, outdated systems, uneven surfaces, or other problems that were not visible during planning.
Set aside part of the available funds for unforeseen work rather than committing the entire budget before demolition begins. The appropriate amount depends on the age and condition of the home, the complexity of the remodel, and how much of the existing kitchen is being disturbed.
If the contingency is never needed, it can remain unspent or fund an optional upgrade near the end of the project.
Track Actual Spending Throughout the Remodel
A budget stops being useful if it is only reviewed at the beginning. Record purchases as they happen and compare actual spending with the original estimates.
Also track changes to the scope. Upgrading a countertop, changing a fixture, or adding lighting can affect more than one budget category. Reviewing the numbers before approving each change prevents several small decisions from creating a large overrun.
A disciplined DIY kitchen remodeling budget gives you more than a spending limit. It provides a decision-making framework for balancing design goals, material quality, professional help, and the realities of the space while keeping the renovation financially manageable.
How to Plan a Functional Kitchen Layout and Lighting Design

A kitchen can have beautiful finishes and still be frustrating to use if the layout works against everyday routines.
Before choosing cabinet colors, countertops, or decorative fixtures, think about how people will actually move through the room. Cooking, food preparation, cleanup, storage, and socializing all place different demands on the space.
For DIY kitchen remodeling, layout and lighting decisions should be made together. Cabinet placement determines where work surfaces will be located, appliance locations influence circulation, and each work zone needs appropriate lighting.
Resolving those relationships during the design stage is much easier than trying to correct them after installation.
Design the Layout Around How You Use the Kitchen
The traditional kitchen work triangle connects the refrigerator, sink, and cooking area. It can still be a useful planning reference, but it should not be treated as a rigid rule.
Modern kitchens often have multiple cooks, islands, separate prep areas, coffee stations, pantry storage, or seating that make a zone-based approach more practical.
Start by identifying the activities that happen most often. Someone who cooks daily may value uninterrupted prep space beside the cooktop, while a family kitchen may need an accessible snack area that keeps children away from the main cooking zone.
Also consider the routes people take through the room. A walkway that repeatedly crosses the primary cooking area can become inconvenient, especially when appliance doors, cabinet drawers, and multiple people compete for the same space.
Plan Cabinets and Storage Around Daily Tasks
More cabinetry does not automatically create better storage. What matters is putting the right type of storage where it will actually be used.
Pots and pans are easier to access near the cooking area. Everyday dishes may make more sense near the dishwasher. Food preparation tools should be close to the primary countertop workspace, while infrequently used appliances can occupy less convenient storage.
Lower cabinets with drawers can make deep storage easier to access than traditional cabinets with fixed shelves. Pantry pullouts, vertical tray storage, corner solutions, and drawer organizers can also make awkward spaces more useful.
During DIY kitchen remodeling, map cabinet contents before finalizing the layout. Assigning a purpose to major cabinets and drawers on the plan can expose storage problems before cabinetry is ordered.
Check Clearances Before Finalizing the Floor Plan
A layout that looks spacious on paper can become cramped once doors and drawers are open. Review how the kitchen functions in motion, not just when everything is closed.
Check refrigerator doors, dishwashers, ovens, cabinet drawers, pantry doors, and seating areas. Make sure one open appliance does not prevent another from being used or block an important passage.
Islands deserve particular attention. An oversized island can reduce circulation and make surrounding cabinets harder to access, while an undersized one may not provide enough functional workspace to justify its footprint.
The right dimensions depend on the room, surrounding cabinetry, appliance placement, seating, and local requirements.
Layer Kitchen Lighting for Different Tasks
One ceiling fixture rarely provides enough light for an entire kitchen. A more functional lighting plan uses several layers.
- Ambient lighting provides general illumination throughout the room. Recessed lights, ceiling-mounted fixtures, or pendants may serve this role depending on the layout and ceiling.
- Task lighting focuses light where detailed work happens. Under-cabinet lighting is particularly useful for countertops because overhead fixtures can leave work surfaces in shadow when someone stands between the fixture and counter.
- Accent and decorative lighting can highlight architectural details, open shelving, glass-front cabinets, or an island while contributing to the overall character of the room.
These layers should work together rather than compete for attention.
Position Lighting Based on the Finished Layout
Lighting should be planned after the major work zones are established but before electrical work is finalized. Positioning fixtures without considering cabinets and countertops can leave important areas poorly illuminated.
Pay particular attention to the sink, cooktop, island, primary prep surfaces, and frequently used storage. Pendant lights over an island should be positioned according to the island itself rather than simply centered within the room.
Switch placement also matters. Think about where someone naturally enters the kitchen and which lights they need to control from different locations.
Electrical installation and modifications must follow applicable codes and may require permits or licensed professionals, depending on local regulations.
Use Natural Light Without Relying on It
Windows and glazed doors can make a kitchen feel brighter and more open, but natural light changes throughout the day. It should complement the electrical lighting plan rather than replace it.
Consider how sunlight enters the room, whether glare affects work surfaces, and how window placement interacts with upper cabinets and storage. Light-colored finishes can also help distribute available light, although material selection should still reflect durability and maintenance needs.
Thoughtful DIY kitchen remodeling treats layout, storage, and lighting as parts of the same design problem. When these elements are coordinated early, the finished kitchen is more likely to feel comfortable and intuitive instead of simply looking good in photographs.
How to Choose the Right Kitchen Cabinets for a DIY Remodel

Cabinetry is one of the biggest decisions in DIY kitchen remodeling because it affects storage, layout, installation, and the overall appearance of the room. Rather than choosing cabinets primarily by door style or finish, start by deciding how much customization the kitchen actually needs.
Stock, semi-custom, and custom cabinets can all work well, but they solve different problems. The best choice depends on the dimensions of the room, your storage requirements, installation skills, project schedule, and budget.
Compare Stock, Semi-Custom, and Custom Kitchen Cabinets
Understanding the main cabinet categories can help you avoid paying for customization you do not need or settling for standard sizes that compromise the layout.
| Cabinet Type | Best Suited For | Main Consideration |
|---|---|---|
| Stock Cabinets | Standard layouts and budget-conscious remodels | Limited sizes, configurations, and finishes |
| Semi-Custom Cabinets | Kitchens needing moderate design flexibility | More choices, but usually a higher cost and longer lead time |
| Custom Cabinets | Unusual dimensions or highly specific storage needs | Greater flexibility with a larger investment |
Stock cabinetry is manufactured in predetermined sizes, making it relatively straightforward to plan and purchase. It can be particularly practical when the existing kitchen has conventional dimensions and the layout is not changing significantly.
Semi-custom cabinetry provides additional choices in dimensions, finishes, door styles, and storage features. It can bridge the gap between standard products and fully bespoke cabinetry.
Custom cabinets offer the greatest control over dimensions and configuration. They can make better use of unusual corners, nonstandard wall lengths, or spaces where conventional cabinet sizes would leave awkward gaps. Custom cabinetry may also be worth considering when storage requirements are highly specific.
Evaluate Cabinet Construction, Not Just Appearance
Two cabinets that look similar from the outside can differ considerably in construction. Before purchasing, inspect the cabinet box, drawer construction, hardware, shelving, and finish rather than judging quality solely by the doors.
Pay attention to how drawers operate, whether shelves can be adjusted, and how easily frequently used items will be accessible. Hinges and drawer slides also affect how cabinetry feels in everyday use.
Material choice matters as well. Cabinet boxes and doors can be made from plywood, engineered wood products, solid wood, or combinations of materials. Each has different characteristics, so compare construction specifications rather than assuming one material automatically makes an entire cabinet superior.
For DIY kitchen remodeling in particular, also investigate how the cabinets are delivered. Ready-to-assemble cabinets require considerably more homeowner labor than fully assembled units, while heavier assembled cabinets can be more difficult to position and install.
Decide Whether Cabinet Refacing Is Enough
A kitchen does not always need completely new cabinetry. If the existing cabinet boxes are structurally sound and the current layout works well, refacing may provide a more focused update.
Cabinet refacing generally retains the existing boxes while updating visible surfaces, such as doors and drawer fronts. New hardware can further change the appearance.
Refacing makes less sense when cabinets are damaged, poorly configured, or no longer meet storage needs. It also will not correct fundamental layout problems. If your goal is to relocate appliances, improve workflow, or substantially change cabinet dimensions, replacement is usually the more appropriate option.
Plan Storage Before Ordering Cabinets
Good cabinet planning starts with what needs to go inside them. Make an inventory of cookware, dishes, pantry goods, countertop appliances, utensils, and other items before finalizing cabinet configurations.
Think about where those items are used. Deep drawers near the range can provide convenient cookware storage, while utensils and preparation tools belong closer to the main work surface. Pantry storage should make frequently used food easy to see and reach.
Features such as pullout shelves, drawer organizers, vertical dividers, corner storage systems, and dedicated trash or recycling cabinets can improve function, but they should solve a genuine storage problem rather than simply adding cost.
Measure Carefully Before Placing an Order
Cabinet measurement is one area where small errors can become expensive. Record wall dimensions, ceiling height, door and window locations, plumbing, electrical connections, vents, appliance dimensions, and any structural features that affect installation.
Do not assume walls, floors, and corners are perfectly square or level, especially in an older home. Account for fillers, trim, appliance clearances, door swings, and finished panels when creating the cabinet plan.
It is also worth verifying every measurement before ordering. Custom cabinets can be especially difficult or costly to correct once manufactured.
For homeowners who need cabinetry designed around unusual dimensions or specific storage requirements, Kitchen and Bath by Zeus offers custom cabinet options that can be planned around the individual space.
The strongest cabinet choice for DIY kitchen remodeling is not necessarily the most expensive one. It is the option that fits the room accurately, supports how the kitchen is used, and can be installed successfully within the project’s budget and skill level.
How to Choose Kitchen Materials That Balance Durability, Cost, and DIY Installation
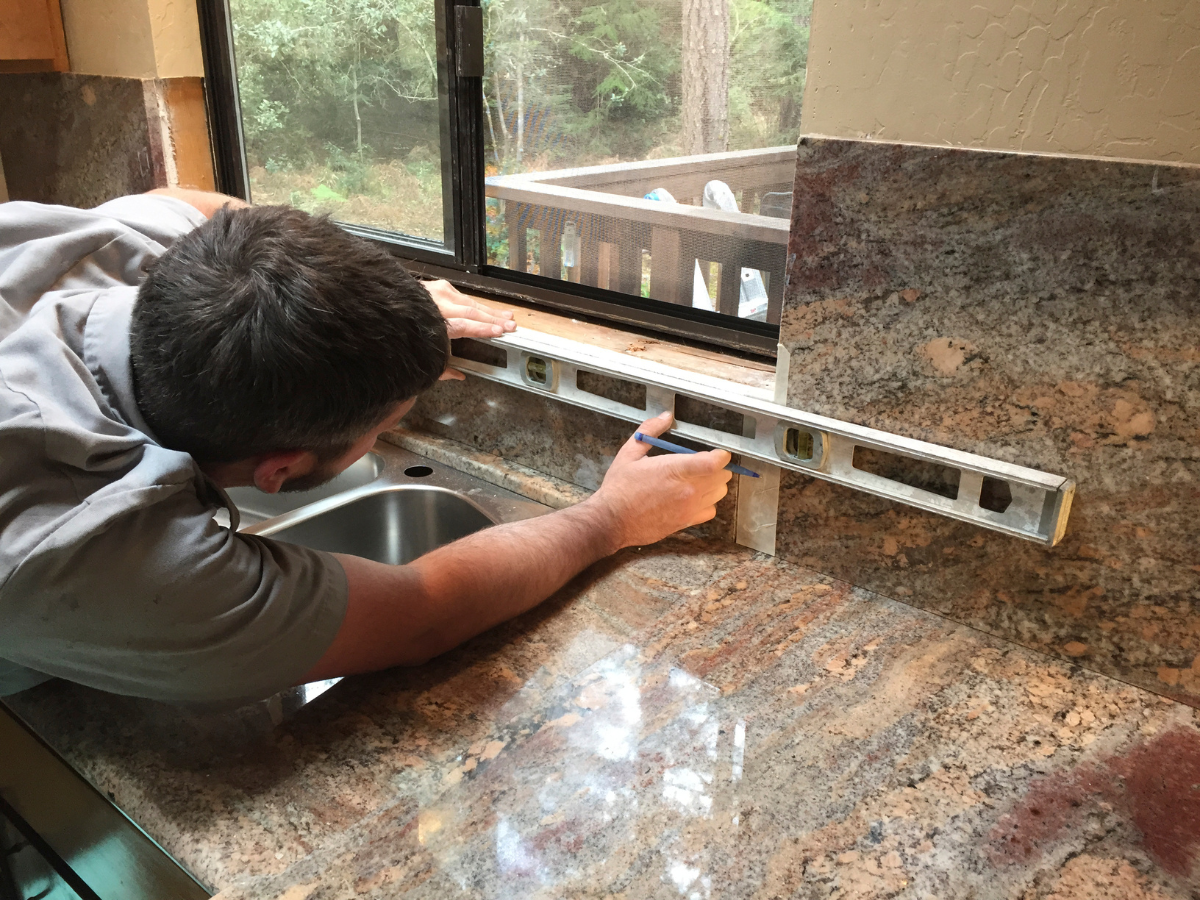
Material selection can make or break a DIY kitchen remodeling project. Countertops, backsplashes, flooring, and other finishes need to work together visually, but appearance is only part of the decision.
Installation difficulty, moisture resistance, cleaning requirements, durability, and repairability all matter once the kitchen returns to everyday use.
For DIY projects, there is another question to consider: can you realistically install the material yourself? A lower material price does not necessarily mean a lower project cost if installation requires specialized tools, fabrication, or professional help.
Compare Kitchen Materials Before You Buy
Rather than choosing finishes individually, compare materials based on how they will perform in the specific area where they are being used.
| Material | Common Kitchen Use | Maintenance | DIY Considerations |
|---|---|---|---|
| Laminate | Countertops | Low | Relatively DIY-friendly, particularly with prefabricated tops |
| Quartz | Countertops | Low | Heavy and typically requires precise professional fabrication |
| Granite | Countertops | Moderate | Heavy, difficult to fabricate, and challenging for DIY installation |
| Ceramic or Porcelain Tile | Backsplashes, floors, some countertops | Low to moderate | DIY-friendly with careful measuring, cutting, and grouting |
| Butcher Block | Countertops, islands | Moderate to high | Can be cut and installed with woodworking tools, but requires appropriate care |
| Luxury Vinyl | Flooring | Low | Many products are designed for straightforward installation |
Think beyond the initial purchase price. A surface that requires regular sealing or specialized maintenance may demand more attention over time, while a more expensive material with simpler upkeep may better suit a busy household.
Which Countertop Material Works Best for a DIY Kitchen Remodel?
Countertops deserve careful planning because installation difficulty varies considerably by material.
Laminate is one of the more approachable choices for DIY kitchen remodeling, particularly when using prefabricated sections.
It is available in a wide range of designs, requires relatively little maintenance, and can work well when controlling costs is a priority. Careful measurements are still essential around sinks, corners, and appliances.
Butcher block is another option homeowners may be able to cut and install themselves. Its woodworking requirements make it more manageable than stone for someone with the right tools and experience. The tradeoff is maintenance.
Wood surfaces need protection from prolonged moisture and should be cared for according to the manufacturer’s recommendations.
Quartz and granite present a different challenge. Both are popular for their appearance and durability, but slabs are extremely heavy and require accurate fabrication for sinks, cooktops, seams, and edges.
Professional fabrication and installation are often the more practical choice, even when the rest of the remodel is DIY.
A useful approach is to divide the project by skill level rather than treating “DIY” as an all-or-nothing decision. You might handle demolition, painting, hardware, or backsplash installation yourself while leaving stone countertop fabrication to experienced installers.
How to Choose a Backsplash That Works With Your Countertops and Cabinets
A backsplash occupies less surface area than cabinetry or countertops, but it can strongly influence whether the finished kitchen feels cohesive.
Start with the elements that are harder and more expensive to change. If the cabinets and countertops are already selected, use their colors, undertones, and patterns to narrow the backsplash choices.
A heavily patterned countertop may pair better with a quieter backsplash, while a simple countertop can leave room for more texture or pattern.
Do not overlook grout. Grout color can either emphasize individual tiles or create a more continuous appearance, so view tile and grout samples together before committing.
Make Backsplash Installation Easier to Get Right
Tile backsplash installation is a realistic DIY project for many homeowners, but preparation matters more than speed. The wall should be clean, sound, and appropriately prepared for the selected installation system.
Before applying adhesive, dry-layout the tile to determine where cuts will fall. Pay particular attention to outlets, corners, cabinet edges, and the area behind the range. Poorly planned cuts in highly visible areas can make an otherwise careful installation look unfinished.
Follow the tile, adhesive, and grout manufacturers’ instructions for surface preparation, application, curing, and sealing where applicable. Different products can have different installation requirements.
Coordinate Materials Without Making Everything Match
One of the easiest mistakes in DIY kitchen remodeling is selecting each finish independently. A countertop may look attractive in a showroom, and a backsplash may look good online, yet the two can compete once installed beside the cabinetry and flooring.
Bring physical samples together whenever possible and view them in the actual kitchen at different times of day. Natural and artificial lighting can change how colors and undertones appear.
Trends can provide inspiration, but permanent or expensive materials deserve a longer-term perspective. Use easily replaceable details such as paint, hardware, lighting, and accessories for highly trend-driven choices.
For countertops, tile, and flooring, prioritize materials you can realistically maintain and live with well beyond the initial makeover.
Know Which Kitchen Remodeling Projects You Can Safely DIY
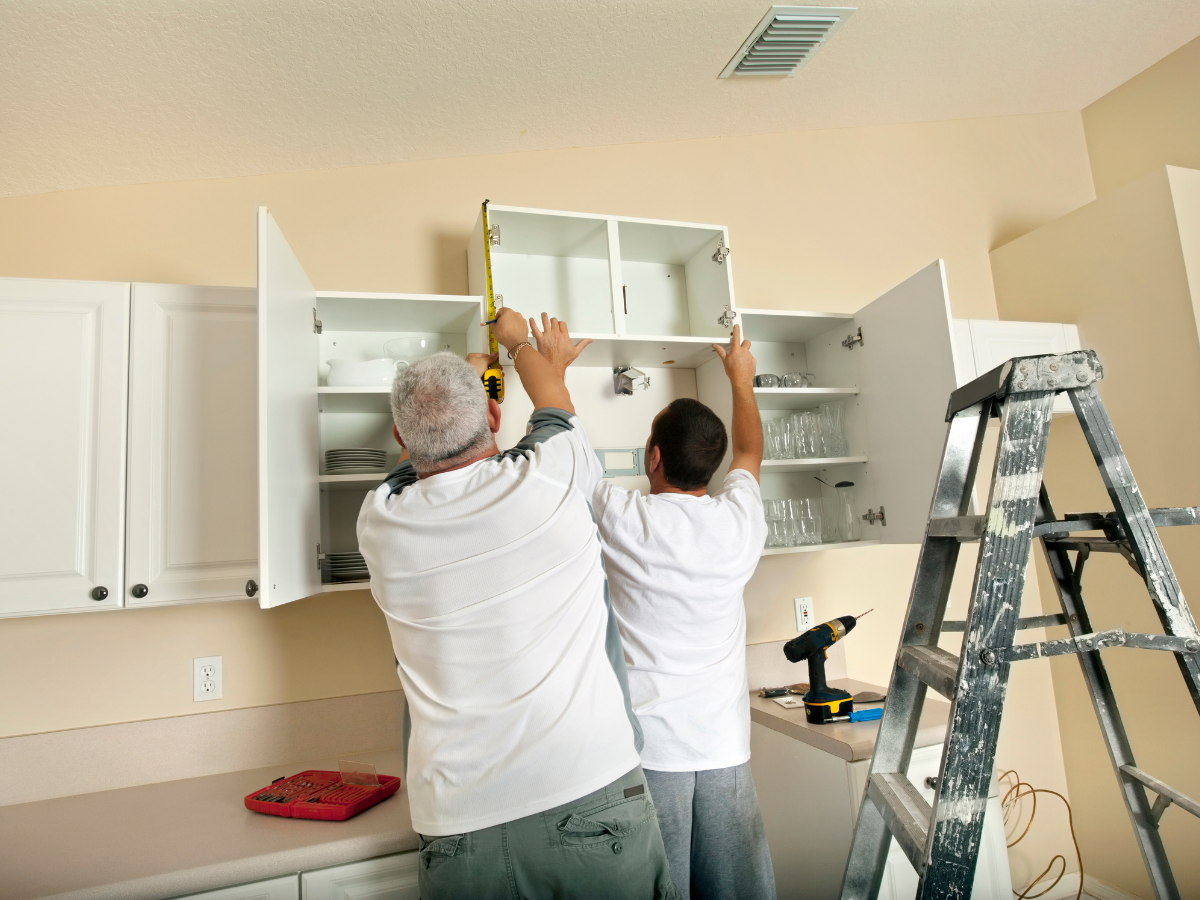
One of the most important decisions in DIY kitchen remodeling is knowing where your own work should end and professional work should begin. Painting walls or installing cabinet hardware carries a very different level of risk from relocating a gas line or altering electrical circuits.
Before demolition begins, separate the project into three categories: work you can confidently complete, work that requires additional research or specialized tools, and work that should be handled by a qualified professional. Making those decisions early helps prevent a seemingly manageable renovation from becoming more complicated, expensive, or unsafe halfway through the project.
Watch for Problems Hidden Behind Walls and Cabinets
Kitchens contain plumbing, wiring, ventilation, appliances, and sometimes gas connections within a relatively small space. Once cabinets, flooring, or drywall are removed, conditions that were not visible during planning may become apparent.
Water damage around a sink or dishwasher, deteriorated subflooring, outdated wiring, damaged plumbing, or unexpected structural conditions can change the scope of the remodel. Rather than automatically covering these problems with new finishes, determine what caused the damage and whether repairs are necessary first.
Older kitchens deserve particular caution. Previous renovations may also have altered wiring, plumbing, walls, or ventilation systems in ways that are not obvious before demolition.
Build some flexibility into both the budget and schedule for these discoveries. If demolition exposes something you cannot confidently identify or repair, stop that portion of the project until it can be properly evaluated.
Protect Yourself During Kitchen Demolition
Demolition may look like the easiest part of DIY kitchen remodeling, but removing materials without understanding what is behind them can cause expensive damage.
Before removing cabinets, countertops, drywall, or flooring, locate plumbing lines, electrical wiring, gas connections, and HVAC components that could be affected. Shut off relevant utilities when necessary, and verify that they are safely disconnected before beginning work.
Wear appropriate protective equipment for the task, which may include eye protection, gloves, hearing protection, respiratory protection, and sturdy footwear. Keep the work area ventilated and control dust rather than allowing demolition debris to spread throughout the home.
Some older building materials can also contain hazardous substances that should not be disturbed without appropriate assessment and precautions. When the age or composition of a material raises concerns, identify it before cutting, sanding, or removing it.
Decide When a Kitchen Project Needs a Professional
DIY remodeling does not mean every part of the kitchen has to be completed without professional assistance. A hybrid approach often makes more sense.
Homeowners with the appropriate skills may be comfortable handling tasks such as:
- Painting and finishing
- Installing cabinet hardware
- Removing certain nonhazardous finishes
- Installing some flooring or backsplash products
- Assembling suitable ready-to-assemble cabinetry
- Completing cosmetic updates
Electrical, gas, major plumbing, structural modifications, and some appliance installations carry greater safety and code considerations. Local requirements vary, so determine which permits, inspections, or licensed trades are required before work starts.
Be especially cautious when changing the kitchen layout. Moving a sink, range, dishwasher, or major appliance can turn what appears to be a design change into plumbing, electrical, gas, ventilation, or structural work.
Avoid Letting DIY Mistakes Become Expensive Repairs
Knowing when to stop is just as valuable as knowing how to complete a task. If something does not match the plans, a connection looks unfamiliar, or the work requires improvising around a safety requirement, investigate before continuing.
Another common mistake is performing work out of sequence. Installing finished flooring before messy construction is complete, ordering countertops before base cabinets are accurately installed, or closing walls before necessary inspections can create unnecessary rework.
A realistic project schedule should account for professional trades and inspections before finish materials are installed.
Use a Hybrid Approach for a More Manageable Remodel
The goal of DIY kitchen remodeling should not be to eliminate professional labor at any cost. It should be to use your own time and skills where they make sense while getting qualified help for work that exceeds your experience or requires professional oversight.
For example, a homeowner might remove old cabinets, paint, install hardware, and complete cosmetic finishes while hiring professionals for electrical changes, plumbing modifications, countertop fabrication, or structural work.
This approach still gives you meaningful control over the remodel and can reduce the amount of contracted work without compromising critical systems.
Before starting each phase, ask whether you understand the task, have the correct tools, can complete it safely, and know what local requirements apply. If the answer to any of those questions is no, professional help is the better next step.
Frequently Asked Questions About DIY Kitchen Remodeling

What Are the Most Common DIY Kitchen Remodeling Mistakes?
The most common mistakes happen before installation begins. Inaccurate measurements, unrealistic budgets, poorly planned work sequences, and ordering materials too early can all create delays or expensive rework.
Another frequent problem is taking on technical work without the necessary experience. Electrical, gas, structural, and complex plumbing work may require permits, inspections, or licensed professionals depending on local requirements.
For a smoother DIY kitchen remodeling project, finalize the layout first, verify measurements more than once, confirm product lead times, and determine which jobs require professional help before demolition begins.
How Can I Make a Kitchen Remodel More Valuable to My Home?
Focus on improvements that make the kitchen more functional rather than simply more fashionable. Useful storage, adequate counter space, good lighting, durable finishes, and an efficient layout have broad appeal because they improve how the room works every day.
If resale is important, consider how the renovation compares with the rest of the home. An extremely high-end kitchen may not always make sense in a modest property, while cutting costs on heavily used surfaces can result in finishes that wear prematurely.
Avoid designing entirely around short-lived trends. Cabinet hardware, paint, and light fixtures are relatively easy to update later, while cabinets, flooring, and countertops are more expensive to replace.
What Are Some Eco-Friendly Options for a Kitchen Remodel?
A more sustainable kitchen does not necessarily require replacing everything with specialty products. Keeping usable cabinets, refinishing existing materials, or refacing sound cabinet boxes can reduce the amount of material discarded during a renovation.
When buying new products, consider durable materials that will not need frequent replacement. Other options include reclaimed or responsibly sourced wood, low-VOC paints and finishes, LED lighting, water-efficient faucets, and energy-efficient appliances.
Waste planning matters too. Before demolition, identify cabinets, fixtures, appliances, or building materials that could potentially be reused, donated, recycled, or salvaged rather than automatically sending everything to a landfill.
How Do I Choose the Right Kitchen Lighting?
A functional kitchen generally benefits from several layers of lighting rather than relying on one central fixture.
Ambient lighting provides overall illumination, while task lighting targets work surfaces such as countertops, sinks, ranges, and food preparation areas. Accent or decorative lighting can then add visual interest where appropriate.
Pay attention to fixture placement as well as brightness. A ceiling light positioned behind someone working at a counter can cast a shadow directly onto the work surface. Under-cabinet lighting can help address this problem in areas with upper cabinets.
LED lighting is widely used because of its energy efficiency and long service life. When comparing fixtures, also consider color temperature, light output, dimming compatibility, and how the light affects the appearance of cabinets and finishes.
What Should I Consider When Choosing Kitchen Appliances?
Choose appliances before finalizing cabinetry and countertop dimensions, particularly when replacing existing units with different sizes. Check the manufacturer’s specifications for width, height, depth, ventilation, electrical or gas requirements, and necessary clearances.
Also consider how doors and drawers open. A refrigerator may technically fit into a designated space but still interfere with an island, wall, cabinet, or walkway when its doors are fully opened.
Features should reflect how you actually cook and use the kitchen. Paying more for functions you rarely use may be less worthwhile than investing in an appliance with the right capacity, efficiency, dimensions, and serviceability.
How Can I Maximize Storage in a Small Kitchen?
Start by improving the usefulness of existing space rather than simply adding more cabinets. Deep drawers can make cookware easier to access, while vertical dividers can organize baking sheets, trays, and cutting boards.
Pullouts can improve access to deep cabinets, and full-height pantry storage can take advantage of vertical space.
Look for overlooked areas as well. Cabinet interiors, narrow gaps, corners, and the space above existing cabinetry may offer additional storage opportunities.
The goal is not to fill every available inch. Keeping frequently used items near the places where they are needed can make a small kitchen feel more efficient without increasing its footprint.
When Should I Hire a Professional During a DIY Kitchen Remodel?
Professional help is worth considering whenever a task exceeds your skills, requires specialized equipment, affects critical building systems, or must comply with permitting and licensing requirements.
Electrical modifications, gas work, structural changes, major plumbing alterations, and some countertop installations are common examples. Local rules vary, so check applicable requirements before starting.
DIY kitchen remodeling can also combine homeowner labor with professional trades. Handling painting, hardware, assembly, or other suitable finish work yourself while outsourcing technical portions can preserve much of the DIY project’s cost control and personal involvement without taking unnecessary risks.
Conclusion
A DIY kitchen remodel can be a rewarding way to refresh your space, but knowing which projects you can tackle yourself and when to bring in a professional is essential for achieving lasting results.
Careful planning, realistic budgeting, and thoughtful material choices can help you avoid costly mistakes while creating a kitchen that better suits your style and everyday needs. For larger renovations or projects requiring professional design and installation, choose Kitchen and Bath by Zeus.
If you’re ready to turn your kitchen makeover ideas into a beautifully finished space, call 404-602-2668 to speak with the team at Kitchen and Bath by Zeus or fill out the online form to schedule your free consultation for property owners today.